You don't need to become a sound designer or get a master's degree in audio production to enhance the audio quality of your podcast. However, if you want to provide your subscribers with a quality product, there are some basics to consider. mínimos que hay que cuidar.
Here, we provide some basic tips and tricks for all budgets to ensure the best possible audio quality.
1. The audio quality is determined by how it´s recorded
We're often used to the idea that photos can be significantly improved after taking them, leading us to believe the same can be done with audio. However, it's an entirely different medium.
As a general rule, you won't be able to enhance poorly recorded audio by much. It's almost impossible to reduce background noise or echoes afterward, at least without compromising the audio quality.
Ensure that the audio is being recorded with quality, without echoes, saturation, or excessive background noise. It's best to preview what you're recording, or at least record for a while in the environment where you'll capture the entire episode and listen to correct any issues before recording the episode.

2. Adjusting the external noise
Ideally, record in a low-noise environment. Close the door and windows, and listen for any external noises. Also, be aware of noises within the room from electronic devices, clocks, your phone, or even the chair.
When a significant amount of noise enters the room and you have no choice but to record there, the best option is to reduce the microphone gain. In other words, decrease the "volume" of the microphone or the intensity at which it captures audio.
The goal is to minimize background noise. Your voice may sound quieter, but this can be corrected later.
If you haven't purchased a microphone yet, for environments that aren't well soundproofed, we recommend dynamic microphones. They are cheaper than condenser microphones (the ones you mentioned) and are better suited to these situations. They have less sensitivity to different audio frequencies, allowing for better noise reduction.
A recommended dynamic microphone: https://amzn.to/3IPYJ8Q
But there are also other budget-friendly options.Don't let budget constraints deter you from recording.
As a reference, this is the podcasting equipment I started withwhen recording in-person. The microphones deliver excellent performance for the price, although they use XLR (special connector) and not USB.
3. Reducing background noise when recording online
If you record remotely, such as conducting interviews, you can use tools like Krisp.aiKrisp reduces background noise by eliminating anything that isn't voice. It's not 100% accurate, but it comes close, and it acts as a "safety net" in environments where there may be noise at any moment.
It has a free plan that allows you to try it out and even use it if you don't record too many hours per month.
4. Eliminating echo to improve audio quality
Echo is another major headache in podcasts. By default, all rooms generate echo as a result of audio waves bouncing off the walls.
To avoid echo, the ideal scenario is to have a soundproofed room, but that's complicated and expensive. However, if we have a room filled with things, it can serve the purpose.
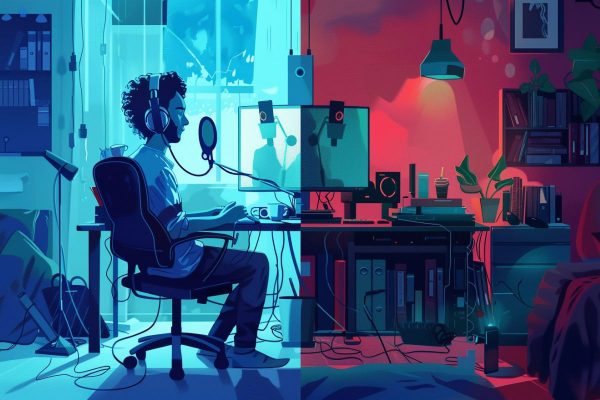
Rooms filled with books significantly reduce echo because paper absorbs some of the audio waves.
Chaos and disorder are your allies in audio quality!
If the objects that audio waves collide with are arranged differently, the echo effect is further reduced. In this case, the waves bounce in different directions, preventing that annoying echo. So, for those of us with cluttered and filled rooms, we've gained a lot in terms of audio, even if others call us a mess.
Reducing the echo noticeably improves the audio quality of your podcast.
Lowering the microphone gain also helps..
In environments with a lot of echo or background noise, creative solutions can be effective in improving audio quality. For example, recording in bed , under a blanket, creating a kind of "wrap" for the microphone with pillows, or recording inside a closet with clothes. In these environments, clothes/blankets/pillows absorb a lot of noise.
5. Eliminating recording noise
This is the trickiest part, but sometimes it's necessary.
For these cases, it's ideal to record a bit of the podcast without saying anything, capturing the ambient noise.
This gives you a reference for what you don't want in the podcast, making it easier to eliminate.
Programs like Audacity (free) have a filter que that partially removes noise,using the voiceless portion as a reference to generate a noise pattern to eliminate later.
In extreme cases, I use the "Noise and Hum reduction" option from Auphonic Leveler.It works well and leaves you with the best possible audio. Although I use the paid option, you can access a couple of free hours of audio processing per month on their website.
6. Gemerating a final master
Once you have all the audio in the quality you want, you need to create a final version. Exporting to MP3 from your preferred program might be sufficient, but I recommend considering "mastering."
Mastering involves creating a final version that takes into account how users will listen to it, especially in terms of audio volume or intensity.
To master, I do two things.
First, while assembling my episode, I ensure that the volume marked by Garageband (the program I use for editing) remains constant throughout the episode.This means ensuring that intros, outros, and voices are all at similar levels or at the levels I want in each case.
This generates a version without jumps in volume intensity.
Once I generate a version from Garageband, I run it through Auphonic, specifically its "Adaptive Leveler" option, configured to -16LUFS.This creates a final MP3 at an appropriate audio intensity for playback on mobile devices.
Mobile devices usually have lower audio output, so this process essentially produces a final MP3 with higher intensity to play well on all devices.

7. It sounds complicated but it´s not: creating your wokflow
It may sound like a lot is needed to generate good audio, but the reality is that these steps easily integrate into your workflow.
I record my interviews from the computer with Krisp.ai always activated to avoid surprises.
I already have my microphone set a couple of points below the maximum by default, at appropriate levels for my room.
When I'm going to record, I ensure the best context (no washing machines running, recording at times when my son is at daycare or usually taking a nap).
Tengo un proyecto base en Garageband para meterle los audios específicos del episodio y con un nivel de intensidad de audio ya establecido.
I have a base project in Garageband to input the specific episode audios with an established audio intensity level.
In short, it's almost all on "automatic," and I don't even notice it anymore.
But initially, it's worth evaluating all these points to produce your podcast.It won't steal much time from you, and you'll gain a lot in the quality of your audio, which your subscribers will appreciate 🙂 🙂
About the author
Mumbler CEO & Cofounder. Slow content creator: newsletters, podcasts and videos.

